Previously I had die cut some words with my Cameo for another layout and had the negative left over. I've been on a kick to use up every little last scrap of paper lately and I wanted this layout to coordinate with some with other pictures from the day, so I figured that adding the leftover piece would be a good way to do that.
In the top corner of the "Sunday Funday" negative die cut, a chunk of the paper was missing where I had test but to make sure the blade depth was set correctly. There wasn't room to trim away the area, so I added a little banner and star embellishment to cover up the missing paper. You'd never know that I was solving a problem would you?!

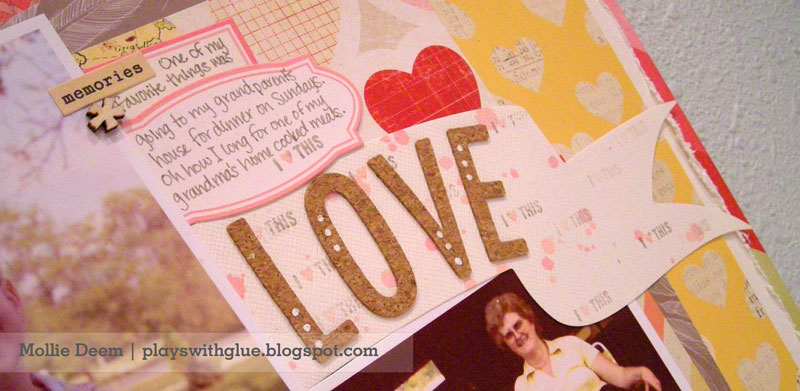
Right now cork letters are popping up everywhere. I love them, but they're a wee bit pricey, so I pulled out my favorite QuicKutz font, Studio, and some adhesive-backed cork from Lifestyle Crafts to cut my own letters.
Tip: Handle the letters carefully as the cork is a little delicate.
The page felt like it need a little "oomph." You know, that thing that draws the eye in and gives it a little movement, a little excitement. So I pulled out my Lifestyle Crafts banner die to create that element, but a plain ol' chunk of cardstock seemed a little boring for a page with so much going on. In order to dress up the die cut and give it some personality of it's own, I stamped on it using a roller stamp that I colored with Tim Holtz Distress Markers. One of the great things about the Distress Markers is that you can get second and third generation impression simply by huffing on the stamp in between impressions. I also added some two-tone ink splatters just for good measure.

Tip: The banner itself wasn't fitting on the page quite right,
so I cut it where I could hide the seam under the photo and made it work with the layout.
Pretty amazing what you can accomplish just by die cutting something as simple as a sheet of paper, huh?

"Love This" by Mollie Deem
Supplies: Cardstock - Bazzill; Patterned Paper - Crate Paper (the Pier), American Crafts (Dear Lizzy Lucky Charm), Studio Calico; Wood veneer banner - Basic Grey; Wood Veneer Letters - Studio Calico; Wood Veneer Arrow - Freckled Fawn; Stickers - Crate Paper (DIY Shop), October Afternoon; Cork, Cutting Dies - Lifestyle Crafts; Pens - Ranger, Uniball; Mist - October Afternoon; Adhesives: EK Success, 3L Adhesives; Kokuyo.
1 comment:
Really like the flow of this one. Thanks for reminding me that negative cuts can be cool...I always toss them. Inspired.
Post a Comment